Prior to printing your Annual Notices and supporting documents/forms, it is recommended to first run the edit checks before printing.
To run the edit checks for all plans in your batch, go to the top of the batch screen and click on the symbol next to "Error". To print Annual Notices and desired supporting documents/forms, click on the "Print" checkbox.

You can also select plans from your list to have the edit checks run and select which plans you want to print the Annual Notice and supporting documents/forms. Select your plans, then click on the "Do with selected".


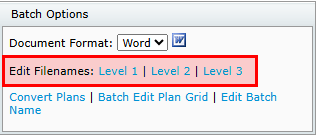
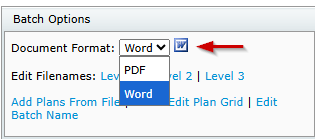
In addition, you have the option to customize the file names via the Edit Filenames, and select your desired format under the "Batch Options" menu.
- Level 1 applies to the folder that is downloaded from your batch. This will contain plan folders and files for all the plans in your batch.
- Level 2 applies to the file or folder within the Zip folder in Level 1.
- Level 3 applies to all the files inside of the folders in Level 2.

On the "Print Batch" page, there are four options available.
1. "Batch Printed" - Updates the "Print" date on the Batch Menu. You can choose to update the print date, leave the print date unchanged, or choose to mark as not printed.


2. "Print Options" - Provides options to choose from on how Annual Notices and supporting materials are printed.
- "ZIP: One Folder, All forms" - generates a zip file in a single folder for all plans in the batch. The folder will include the Annual Notice and selected supporting materials.
- "ZIP: One folder per Plan, One file per form" - generates a zip file with individual folders for each plan in your batch. Individual plan folders will contain the appropriate Annual Notice and selected supporting materials for the specific plan.
- "ZIP: One Plan, All forms single file" - generates a zip file containing a single document with all Annual Notices and selected supporting materials for all plans in the batch. This will be a large file. You can expect to experience additional time for it to download and print.

3. "Cover Letter" - Provides the option of using the "Default Annual Notice" cover letter. You can modify the letter by clicking on the "Edit" link next to the drop-down menu.

4. "Suppress Error Page" - gives the option of suppressing the error page. The error page generates as the first page of all documents when the checklist has not passed all edit checks.

After making your print selections, choose which supporting materials you would like to include, and click on the "Print" button at the bottom of the menu.

PLEASE NOTE: If you have QDIA only plans, you will need to use DocPrint to print these notices as you cannot add plans to the Batch Annual Notice that do not require an Annual Notice.
In 403(b) Only batches, you can select to add the Universal Availability Notice, and 415 Notice.
The Discretionary Match Kit will only appear as an option if the plan requires it.
