The Batch Annual Notice feature can be accessed in two places: via the Wolters Kluwer menu and via the print Plan Documents page after plan selection.


To create a batch, first select the Month and year (PYE), then click on the "Select Date" button. For example, for notices effective January 1, 2026, select December for the "Month" and 2026 for the "Year End".

1. To create a batch, click the "Create New Batch" button.

2. Type in a name for the batch and click "Ok".
PLEASE NOTE: Separate batches are required for 401(k) plans and 403(b) plans. To prepare notices for 403(b) plans check the box "403(b) Only". You will be able to generate an Annual Notice, Universal Availability Notice and 415 Notice for each 403(b) plan in your batch.
You will be directed to the batch menu where you can add plans to your batch.

To select an existing batch, click on the batch name.

There are two options for adding plans to a batch. You can click on the "Add Plans" button near the top of the menu. Or you can use the "Add Plans From File" option available under the "Batch Options" menu.

To add plans via the "Add Plans" button, the software will open a window displaying a list of all plans on your account that require an Annual Notice for the specified PYE. Keep in mind, if your batch is 403(b) Only, then 403(b) plans that require an Annual Notice will be listed.
Filters at the top of the window may be utilized to narrow the list of plans. You can choose to select plans individually or by checking the select all box. Once you have selected your desired plans, click on the "Add" button.
PLEASE NOTE: the software will prevent plans from being added to multiple batches for the same PYE. In addition, for efficiency, we recommend limiting the number of plans in your batch to 300 or less.
If you cannot locate a plan in the list, it is possible that the plan is already in another batch, the plan is marked as not responsible for Plan Documents, or you may need to review the plan provisions to determine why the plan is not on the list.

To upload a list of plans, click on the link "Add Plans From File", located under the Batch Options menu. Download the "Export Plan List" first. This list will be the same as it appears on the "Add Plans" grid. You can filter the list using Excel and save your changes as a CSV file. This file contains the required IDs (FTWCustomerID and FTWPlanID) for the software to add the plans to the batch.
PLEASE NOTE: The required IDs columns should not be changed or eliminated.


Next, you can upload your plans from the bottom of the "Upload Plans to the Batch" window. Choose the file that you saved. If rows were added to the file that are above the column headers, indicate the number of rows to ignore. Click on the "Submit" button to upload the file and add plans to your batch.

PLEASE NOTE: If your batch is 403(b) only, you can only upload 403(b) plans. If your batch is not 403(b) only, then you cannot add or upload 403(b) plans to your batch.
Once you have added your plans to your batch, there are several functions available to you.
Delete a plan from the list - if you have added a plan by mistake, you can remove the plan from your batch. First, select the plan and then click on the "Do with selected" drop down and choose "Remove".


Edit Plan parameters - if you would like to update certain parameters that affect the Annual Notice, you can do this within your batch. Click on the "Batch Edit Plan Grid" link located under the "Batch Options" menu.

Click on the "Grid View" button and select "Annual Notice" from the drop down. The software will display all the parameters that may be updated from the checklist.

For additional assistance with the grid, you can click on the "Grid Key" in the upper right. This key will provide an explanation of the shading in the grid. For an explanation of the column header and which question is linked to the plan document checklist, you can click on the "Grid Help" link.

You can also update certain parameters by clicking on the "Do with selected" button at the bottom and select "Change columns" from the drop down. You will want to first select the plans that you want to update.


Then select the check box for the parameter that you want to update and then click "Ok" at the bottom of the menu. The software will update all plans selected.

Change batch name - if you would like to change the name of your batch, you can do so by clicking on the "Edit Batch Name" link located under the "Batch Options" menu.

Type in the new name and click the "Change name" button.

Prior to printing your Annual Notices and supporting documents/forms, it is recommended to first run the edit checks before printing.
To run the edit checks for all plans in your batch, go to the top of the batch screen and click on the symbol next to "Error". To print Annual Notices and desired supporting documents/forms, click on the "Print" checkbox.

You can also select plans from your list to have the edit checks run and select which plans you want to print the Annual Notice and supporting documents/forms. Select your plans, then click on the "Do with selected".


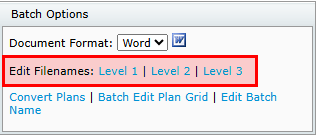
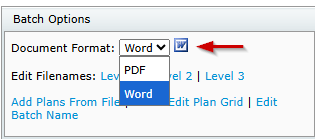
In addition, you have the option to customize the file names via the Edit Filenames, and select your desired format under the "Batch Options" menu.
- Level 1 applies to the folder that is downloaded from your batch. This will contain plan folders and files for all the plans in your batch.
- Level 2 applies to the file or folder within the Zip folder in Level 1.
- Level 3 applies to all the files inside of the folders in Level 2.

On the "Print Batch" page, there are four options available.
1. "Batch Printed" - Updates the "Print" date on the Batch Menu. You can choose to update the print date, leave the print date unchanged, or choose to mark as not printed.


2. "Print Options" - Provides options to choose from on how Annual Notices and supporting materials are printed.
- "ZIP: One Folder, All forms" - generates a zip file in a single folder for all plans in the batch. The folder will include the Annual Notice and selected supporting materials.
- "ZIP: One folder per Plan, One file per form" - generates a zip file with individual folders for each plan in your batch. Individual plan folders will contain the appropriate Annual Notice and selected supporting materials for the specific plan.
- "ZIP: One Plan, All forms single file" - generates a zip file containing a single document with all Annual Notices and selected supporting materials for all plans in the batch. This will be a large file. You can expect to experience additional time for it to download and print.

3. "Cover Letter" - Provides the option of using the "Default Annual Notice" cover letter. You can modify the letter by clicking on the "Edit" link next to the drop-down menu.

4. "Suppress Error Page" - gives the option of suppressing the error page. The error page generates as the first page of all documents when the checklist has not passed all edit checks.

After making your print selections, choose which supporting materials you would like to include, and click on the "Print" button at the bottom of the menu.

PLEASE NOTE: If you have QDIA only plans, you will need to use DocPrint to print these notices as you cannot add plans to the Batch Annual Notice that do not require an Annual Notice.
In 403(b) Only batches, you can select to add the Universal Availability Notice, and 415 Notice.
The Discretionary Match Kit will only appear as an option if the plan requires it.
Customers that also subscribe to ftwPortal Pro can choose to deliver Annual Notices and supporting documents/forms using the "Publish" option at the top of the Batch Menu.

Prior to publishing your Annual Notices and supporting documents/forms, it is recommended to first run the edit checks before printing.
To run the edit checks for all plans in your batch, at the top of the Batch Menu, click on the symbol next to "Error". To publish Annual Notices and desired supporting documents/forms, click on the "Publish" checkbox.
You can also select plans from your list to have the edit checks ran and select which plans you want to publish the Annual Notice and supporting documents/forms. Select your plans, then click on the "Do with selected".


On the "Publish Batch" page, you can choose which documents/forms you want to include update the "Batch Publish" status, choose your publish options via the "Publish Options" drop down, and suppress the error page. Once you have made your selections, click on the "Publish" button.

On the "Publish Batch" page, there are three options available.
1. "Batch Published" - Updates the "Publish" date on the Batch Menu. You can choose to update the publish date, leave the publish date unchanged, or choose to mark as not published.

2. "Publish Options" - provides options to choose from on how Annual Notices and selected documents/forms are published to the Portal.
- "One File per Form" - sends all Annual Notices and selected documents/forms in individual files. This option is recommended for E-Sign.
- "One File, All forms" - sends all Annual Notices and selected documents/forms in one file. This may be a large file. You may experience additional processing time.

3. "Suppress Error Page" - gives the option of suppressing the error page. The error page generates as the first page of all documents when the checklist has not passed all edit checks.

After making your publish selections, choose which documents/forms you would like to include, and click on the "Publish" button at the bottom of the menu.
PLEASE NOTE: If you have QDIA only plans, you will need to use DocPrint to publish these notices to the Portal as you cannot add plans to the Batch Annual Notice that do not require an Annual Notice.
In 403(b) Only batches, you can select to add the Universal Availability Notice, and 415 Notice.
The Discretionary Match Kit will only appear as an option if the plan requires it.

A progress bar window will appear to indicate you are ready to proceed. Click on the "Ok" button.

The software will direct you to the Communication Manager in the Portal, where there are several options to choose from.
1. Classifications: If you are publishing more than one document with different types of "Classifications", the classification type of "Plan Forms" will default. If you have just one type, for example Annual Notice, the classification type of "Plan Annual Notice" will default. You can choose a different classification from the drop-down menu.
2. Subject: Each communication requires a subject to be sent.
3. Send Email Invite: This toggle option indicates whether communication will be sent to the Portal User that the items are available, or you can choose to publish the files to the Portal without an invitation. When the toggle is gray (off mode), an invitation will not be sent.
4. Confirmation Email Recipient: This field indicates who will receive confirmation that the Portal User has downloaded, or E-Signed the documents in the communication. This will either be the Admin associated with the plan or the Master User on your account.
5. Expires Field: This field allows you to set an expiration date. Once the date has passed these documents will no longer be on the Portal User's Portal. NOTE: this is an uncommon field, as most prefer their Portal Users to have access to these documents on an ongoing basis.
6. Email Invite: This field indicates what template to use when sending the invitation to your Portal User to inform them of items to review or sign. You can select from system generated or custom templates from the dropdown icon in this section. You can also create or edit templates by selecting the gear icon to the right of the template dropdown.
7. Portal Message: This is the message that is displayed within the portal view for your Portal Users. This can be left blank, you can enter a custom message, or you can choose to have the email invitation copied to the Portal message by checking the box next to "Same as Email Invite".

8. Folder Name: This allows you to specify a folder for the documents you are publishing to the Portal. This is often used to help organize documents by specific years or item type.
9. Add ToDo with Portal Access: This allows you to add items that do not require action to the Portal User's "ToDo" list. Adding items to the ToDo list will also trigger reminders if reminders are set in the Global Email Settings. To add viewing the document to the Portal User's ToDo list after E-Signing, be sure to check the box.
10. Do with Selected: This field will allow you to add E-Sign options, remove E-Sign options, or remove selected plans/files from the batch.
11. Preview Portal Invite: The tri-colon at the bottom of the page allows you to preview your communication.
12. Direct-Link: The chain icon at the bottom of the page allows you to send your documents/files in email. This offers the Portal User the ability to access the documents within the communication (Direct Message) without having to log into the Portal.
Please Note: Direct-Link cannot be used for items set for E-Sign. When Direct-Link is enabled, the link will turn green. To use this feature requires "Specify a Server" to be set up in your Global Email Settings. For detailed instructions on Specify a Server, please click here. For detailed instructions on how to verify your Global Email Settings, please click here.

When using Direct-Link, you can also set an expiration for how long the link is visible.


Once you are ready to send your communication to the Portal, click on the "Post+Send Invite" or "Post" (depending on your selections) button at the bottom of the page. A window with a progress bar will generate. Click the "Ok" button.
You can now view the communications on the Global or Plan Level Dashboards. The red flag on your dashboard indicates there are unread messages for that Portal User. The Batch column indicates the name of the batch file the plan is in.

